


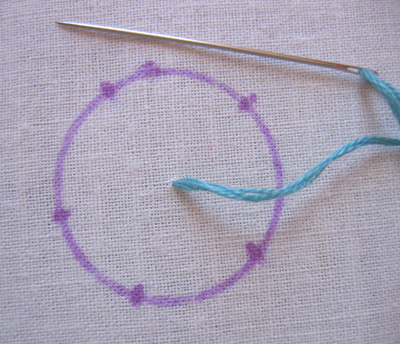
Start by drawing a small circle on your fabric—mine is about the size of a quarter. Mark the center and five evenly-spaced points around the outside edge. Bring your thread up in the center.
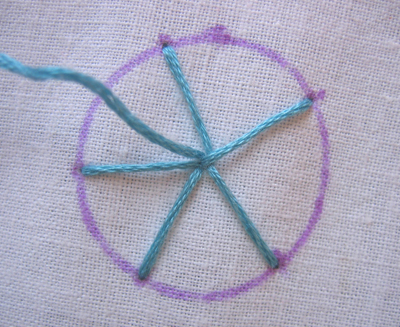
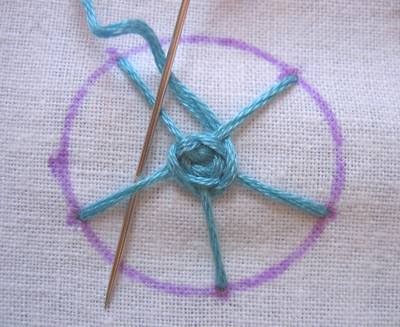
Take five straight stitches from the center out to each of the five points that you marked. Bring your thread up again in the center in between two of the "spokes".
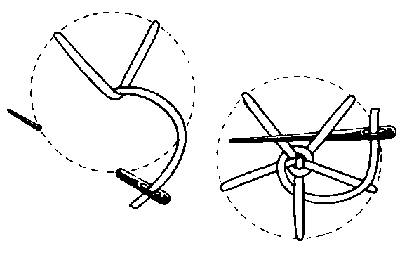
Without going through the fabric, weave the thread under and over the five straight stitches, making sure to alternate between spokes.
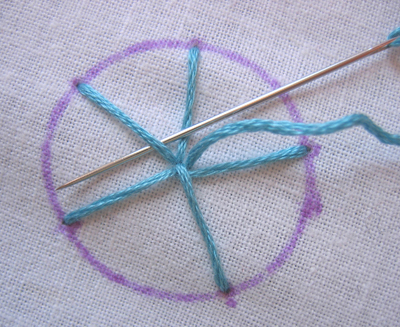
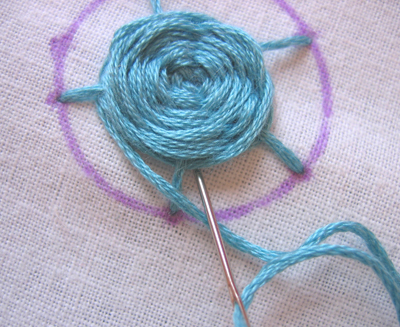
Because you're working with an uneven number of spokes, the next time you come around the circle you'll be doing the opposite of what you did before, so each spoke will alternate under and over. As you go around, guide the thread around the previous one with your thumb. You can keep the thread tight near the center but make it looser as you work outward. Otherwise, if you pull too tightly, it will pull over the previous thread. This is a little hard to explain but you'll understand once you start working this stitch.
When you want to stop, take your thread to the back slightly under the edge of the outer thread and near one of the spokes. This will help to hide the end.
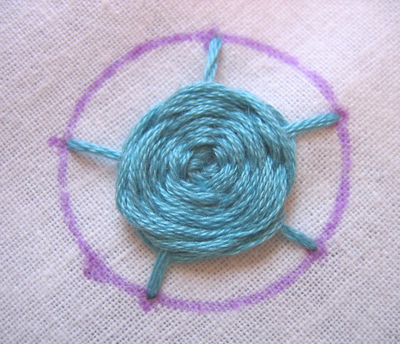
Here's what it looks like when you stop the woven threads partway out and keep the ends of the spokes showing. (I've used a fade-away marker for my circle, so the lines will disappear in a day or so).
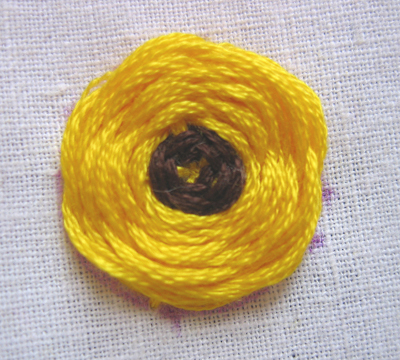
And here's another version with a second color in the center (just stop one color and start another) and the weaving taken all the way to the edge. The weaving creates a raised-off-the-surface texture and would be a cool way to do flowers!

11 comments:
I just wanted to say thank you for these instructions!! Your blog has taken my embroidery to the next level!
I wonder if this is the stitch I've seen used to embroider Hollyhocks.
It could be the same stitch - it does look like a bit like a hollyhock flower!
The spider stitch would look more nice, when done with Kamal Thread.... :-)
Minnu, can you explain what kamal thread is? I'm not familiar with it and my readers probably are not either.
I am just getting into all aspects of sewing, patchwork and embroidery and I have to say that these instructions are just what I needed! Awesome, I will be recommending you to all my crafty friends.
Thank you for this fantastic explanation. I am oh so new to this world but taking a class with Amy Powers and she recommended we stop in here for a visit. So glad that I did. This stitch will be making an appearance on my sampler!
Kamal is an Indian embroidery technique and the Kamal Kadai stitch is very similar to the spiders web - a bit more elongated though. You will find it on Pinterest.
Obrigada por postar seus bordados, são lindos e vou tentar fazer alguns pontos.....
Tiempo buscando una explicación! Gracias Janet. Saludos desde Panamá.
Estoy haciendo la puntada telarana para una toalla. Me gusta mucho esta pagina, Gracias Janet. Saludos desde Mexico.
Post a Comment