31 December 2009

palestrina stitch

Palestrina stitch, which is also called old English knot, double knot stitch, and tied coral stitch, creates a line of raised knots that is useful for creating outlines and borders. The secret is to keep your knots evenly spaced and fairly close together. Here's how to do it:

Draw a straight line on your fabric to use as a guide in keeping your stitched line straight. Take a short straight stitch from top to bottom on the line. After pulling your thread through, come up again just to the left of the bottom.


30 December 2009

blanket stitch

Today we’re talking about Blanket Stitch and (no surprise here) it’s traditionally used to edge blankets. It also makes a great edging for tea towels, dinner napkins, and baby sacques, which are little flannel kimono-type garments that are open in the front and tie at the neck with ribbon. Here’s an example:

blanket_6

blanket_7

The top stitch in the second picture is called feather stitch and you'll find instructions for this stitch in the stitches list in the lefthand sidebar. Blanket stitch can also be used for attaching appliquéd pieces of fabric to a base. Here’s an example from a vintage baby quilt—

blanket_5

And here’s a holiday ornament I made from felt. The cardinal’s body is attached to the underlayer with tiny blanket stitches and the two circles are bound together at the edges with larger blanket stitches. Blanket stitch works very well around curves!

blanket_9

feather stitch

Feather Stitch is a little more advanced than some of the stitches we’ve been doing but I think you guys can handle it. It’s a delicate-looking stitch and is often used on baby and children’s clothing, like the flannel sacque shown here:

blanket_7

It’s also a common stitch for embroidering crazy quilts. This example is done with two colors of thread—pink and brown.

feather9

It will help a lot when doing this stitch (at least at first) if you mark your fabric with four parallel guidelines. I like to use one of those fade out quilt markers that make a purple line that disappears in a couple of days. You can also use the blue ones that will wash out. If you’re just practicing use a pencil or thin marker.

cross stitch

Cross Stitch is probably the oldest and best known of the embroidery stitches. It's essentially two straight stitches worked on the diagonal with one placed crosswise over the top of the other. You use an even weave fabric like linen, coarse cotton, or Aida cloth and you count the threads to keep your stitches the same size and evenly spaced. You'll sometimes hear this referred to as counted cross stitch and that's why. I'm using linen for my examples but will also show you an example of Aida below. Personally, I don't like the stiffness or look of Aida, but you may find it easier to work with at first—at least the holes are easier to see.

Cross stitch is done in a row, with the first half of the stitches worked in one direction and then completed on the way back across the row. Most people probably won't be able to tell if you haven't kept your stitches all in the same direction, but it makes for a neater and more professional look.

To start, bring your thread up in the space between threads in your fabric. Count up a certain number of threads (I used four) then to the right the same number. Take your needle to the back and pull the thread through.

cross1

25 December 2009

stem and outline stitches

We may as well start at the beginning with the most common and widely-used embroidery stitches—the stem (sometimes called crewel) and the outline. Both are used primarily for (you guessed it) stems and outlining and they are very similar in how they are worked. For stem stitch the thread is always kept below the needle; for outline it’s always kept above. They look pretty similar when completed, too.

stem+outline

lazy daisy

Lazy Daisy is the common name for the detached chain stitch, which is a looped stitch that can be worked alone or in groups. Once you master it, you can combine the individual stitches in a length (this is called chain stitch) or in clusters to make flowers and leaves. You can even get ambitious and try something like this:

ld01

01 January 2009

beads.3

So, where can you find cool beads to embellish your needlework? Here are some ideas:

• Bead shops. With the recent popularity of jewelrymaking, bead shops have popped up in most cities and they're great places to see (and touch) beads in person. A bit overwhelming perhaps but, if you can survive a fabric store, you can handle this, too!

• Craft, hobby, and fabric stores. JoAnn Fabrics, Michaels, Hobby Lobby, and A.C. Moore all have jewelrymaking sections, usually an aisle or two of beads and supplies. Nothing too fancy or out of the ordinary but a good selection of basics. I bought those tiny pearl beads that I used for the second Beads post at A.C. Moore.

• Online. There are tons of online bead shops, some that are offshoots of retail shops and some that have catalogs as well. Here are some popular ones:

Shipwreck Beads—huge selection including 2,800 styles and colors of seed beads
Fire Mountain Gems—celebrating their 35th anniversary/free catalog available
Bead Studio—there's also a retail shop in Ashland, OR
Beadstore—beads and embellishments from around the world
Happy Mango Beads—handcrafted, fair-trade beads from around the world

• Bead shows. These take place in various cities around the country (links below) and are mostly for serious jewelry artists. Lots of exotic stones, African trade beads, Middle Eastern and Indian metal charms. I've been to The Whole Bead Show, held in the ballroom of the Hotel Pennsylvania in New York City, and it was incredible. I've never seen so many cool things in one place before.
Bead and Button Show—an annual show in Milwaukee hosted by Bead and Button Magazine

Lapidary Journal has a show list here.

• Ebay. You know you can find anything and everything here. Search in:
Crafts>Bead Art>Craft Beads
Crafts>Bead Art>Charms
Jewelry & Watches>Loose Beads

• Vintage. Don't forget to look for vintage jewelry at flea markets and antique malls. You want pieces that have lots of beads and that don't cost too much. I found this 70s multi-strand necklace at a local shop for $3—just look at all those beads!

vintage beads

Feel free to share your sources in the comments.

beads.2

In the first beads post I showed you the basics of attaching beads to your work. But how do you attach objects with a single hole? And how do you make those cool hanging fringes like on the gray purse I showed in that first post? By sewing one bead on top of another, of course!


For sequins (like on the bird holiday ornament shown above) or for a button with one hole (my examples are German pink glass cup-shaped flowers) lay the object on the fabric, come up through the hole with your needle, slip a small bead (or pearl in this case) onto the needle, then go back down through the hole—the object is held in position by the bead.


You can attach anything flat this way—a cutout felt flower, a small metal washer, a length of ribbon (using a row of beads)—anything that isn't too thick and that you can make a hole in. All you need to worry about is that the top bead is large enough to not fall back down the hole in the object underneath. Sequins aren't a problem because the holes are tiny but if you decide to attach objects you'll need to consider this.

To make fringe, thread the beads onto your needle, pull your thread through, go around the last bead, then back through the others. Secure your thread back at the place where you started.


This is kind of like using a head pin in jewelrymaking with your top bead taking the place of the metal cap. And you can use a bead that's smaller than the others for your end bead—your thread will be less noticeable that way. Make sure you use a nice strong thread for this technique—you want flexibility and "swing" without your fringe breaking and scattering beads everywhere.

One more post about beads will be coming shortly—with some ideas about where to find cool ones!

beads.1

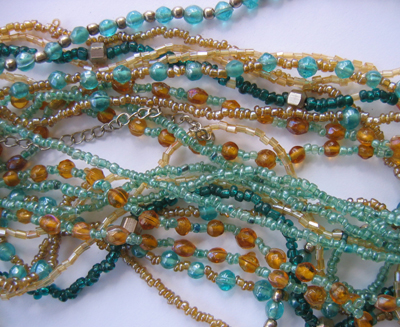
Embroidery looks great all by itself, but sometimes you want a little extra something. Using beads is a great way to add texture and sparkle. Some of you know that I collect decorative purses—mostly vintage silver mesh and art deco beaded ones—but I also have a few more modern ones that use beads decoratively. Here are a few examples.

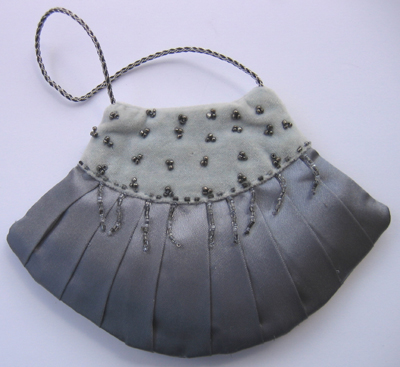
Anthropologie gray satin pleated purse with silvery beads.


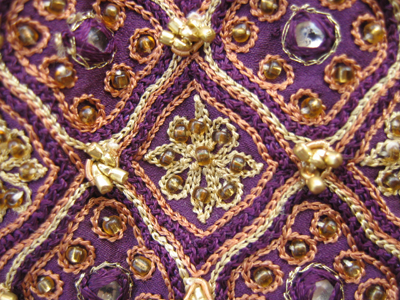
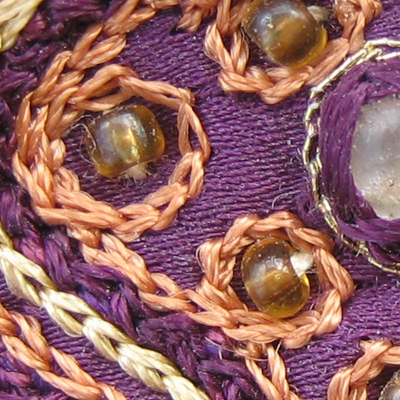
Chinese drawstring purse with chain stitch embroidery and beads.


Now, for the how-to. You'll want to use thread (embroidery floss is fine, too) that is the same color as the beads or the same color as your fabric. I'm not doing that here because I want you to be able to see the stitches clearly in the pictures. And test first to make sure your needle is thin enough to pass through the bead opening.

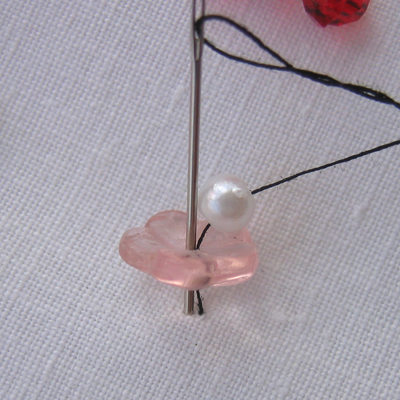
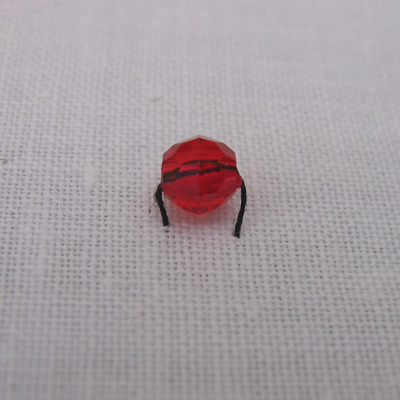
Start by making a small knot at one end of your thread, or work several small stitches on top of one another on the back side of your fabric. Bring your needle to the right side and pick up a bead. Slide it down until it rests on the fabric surface.


Bring your needle to the back a short distance away—with your spacing equal to or slightly less than the width or height of the bead.


If you're sewing one bead, that's it. Knot or weave your thread in on the back and you're done.


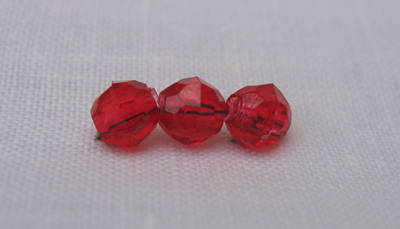
For more beads (a cluster of three like the gray purse shown above, or a sprinkling over your fabric surface) just keep going, but make sure you don't leave too much space between your first and next bead—you don't want long threads on the back. And it's probably a good idea if the beads are spaced apart to take an extra stitch (or two) through the bead hole.

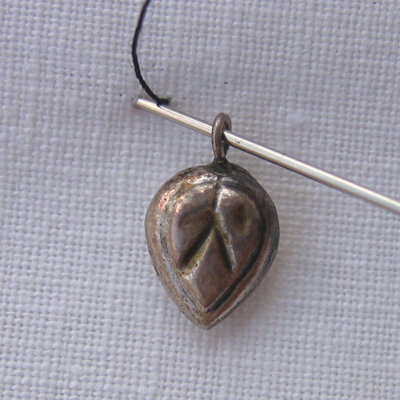
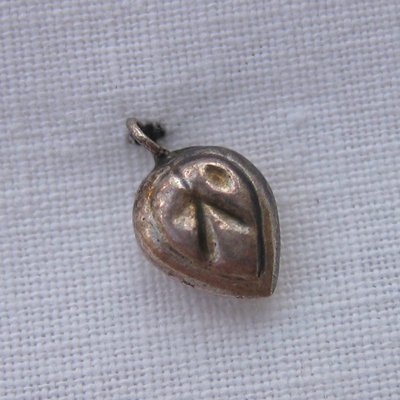
Use this same technique to attach charms or other items that have a ring or loop at the top.


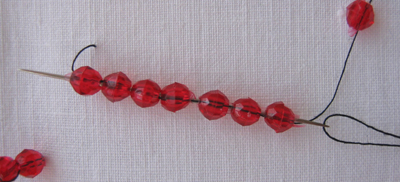
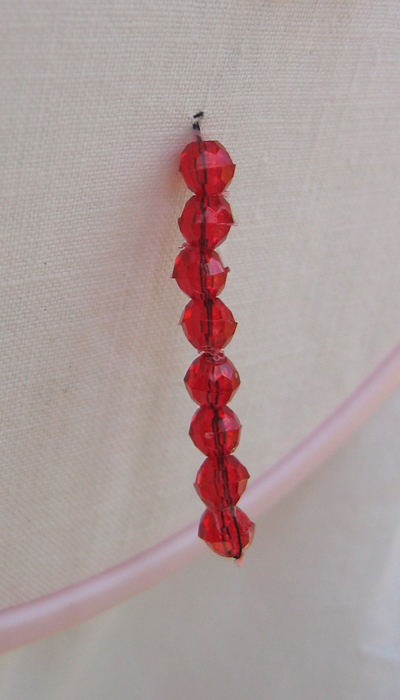
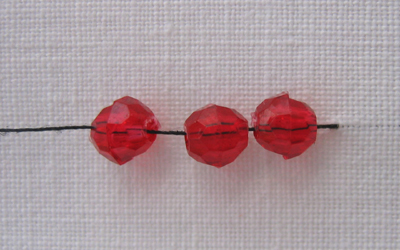
You can also make a short row by threading several beads onto your thread and tacking it down at the end.


This post is already pretty long so I'll continue in a second part and show how to attach sequins (or other objects that have a single hole) and also how to make fringe—like on that gray purse shown above.

What got me thinking about this subject was a book I found at the library called Fashion Bead Embroidery by Natalie Giltsoff that had some great (although dated—it was published in 1971) ideas, including beaded bags, fabric-covered buttons, gloves, shoes, and dress necklines. There are tons of more modern books, too—just type in bead embroidery at Amazon and you'll find more than 600 of them! If anyone has a favorite resource, please share in the comments.