


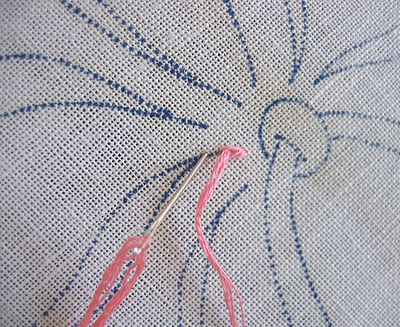
Bring your thread to the front, then take the needle to the back about 1/8 inch away.

Pull the thread through, then bring your needle up in the center of the first stitch, splitting the thread with the needle. This will work best if you use an even number of strands of embroidery floss. I used 4 but you could use 2 for a fine line or 6 for a heavier one. Pull the thread through to complete the first stitch and begin the second.

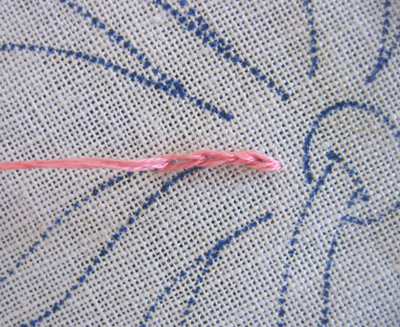
Again, take the needle to the back 1/8 inch away.
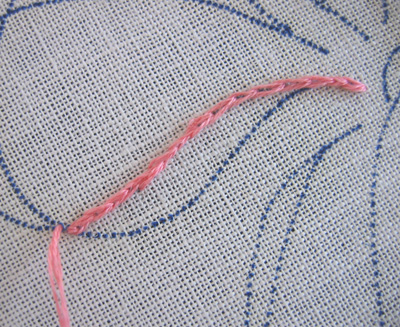
Pull the thread through and emerge in the center of the second stitch. Continue working your stitches in the same manner. Hide the thread at the back when you're finished with the line.
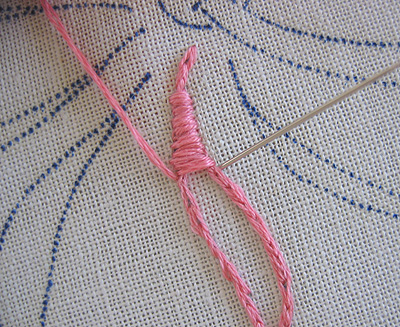
This is the first time I've done this stitch and I found it very awkward. My line looked better as I went along, but I still think it looks too much like chain stitch. And I don't think it's supposed to. So I think I need to practice this one a bit more. I'll revise these directions and pictures if I come up with an easier way to do it.
Last week I showed you how to do satin stitch with a drawn line. Another way to do it, and one that maintains a sharper line, is to outline your shape first with split stitch. Then work over the top of it, taking your thread over the outline so you're covering it completely, and angling your needle slightly towards the center. Like this—
I usually show examples from vintage linens that I own but I couldn't find any that used this stitch. Split stitch is not something you see that often and I'm not sure why. Maybe because it's underneath all the satin stitch :)

2 comments:
Thank you for showing that stitch. The reason I really like it is the way to use it for Satin Stitch, I have a real problem with S.S. and this looks and easier way to do it. I will let you know if it works for me.
I think that the reason why that stitch looked like chain was because you need to smooth out the embroidery thread before sewing and stab up through the hole of the stitch before it (which if your stitches are even, should be the middle as you instruct). Hope that helps!
Post a Comment