


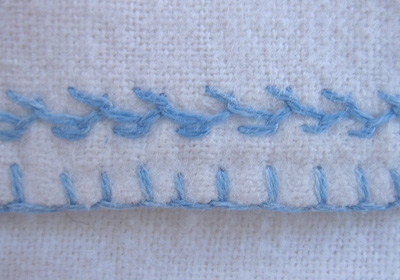
Feather Stitch is a little more advanced than some of the stitches we’ve been doing but I think you guys can handle it. It’s a delicate-looking stitch and is often used on baby and children’s clothing, like the flannel sacque shown here:
It’s also a common stitch for embroidering crazy quilts. This example is done with two colors of thread—pink and brown.

It will help a lot when doing this stitch (at least at first) if you mark your fabric with four parallel guidelines. I like to use one of those fade out quilt markers that make a purple line that disappears in a couple of days. You can also use the blue ones that will wash out. If you’re just practicing use a pencil or thin marker.
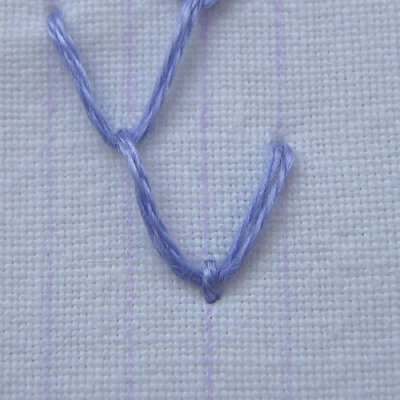
To start bring your thread to the front on the first line. Holding the thread down with your left thumb, insert your needle on the third line even with where the thread emerges. Then, working downward and diagonally, come up on the second line.
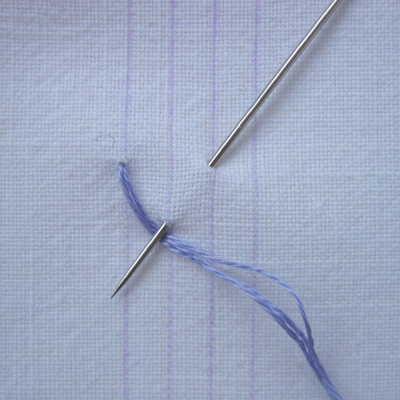
Keeping the thread under the needle point pull the thread through to make the first stitch.
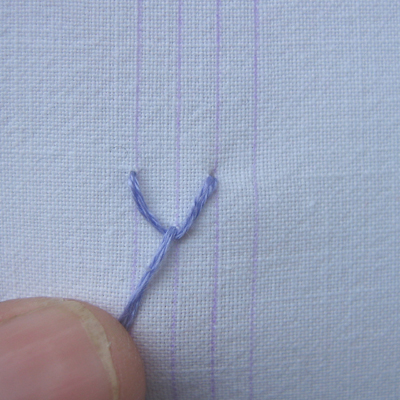
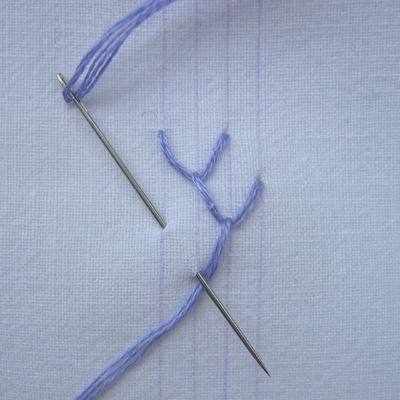
Now insert your needle on the fourth line and parallel to where your needle emerged on the last stitch. Come up again on the third line.

Do the same thing again with the needle down on the first line and back up on the second. Continue working back and forth across the lines. You’re essentially making a series of scallops that are held in place by the beginning of the next stitch.
To finish, take a tiny stitch over the last loop.
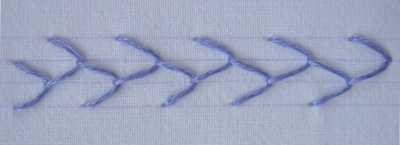
And here’s what it looks like finished. I have to admit that this is the first time I've tried this stitch and, although it looks kind of tricky, it's really very easy. You'll be zipping along in no time at all.
The look of this stitch will vary greatly depending on the angle of the needle, the length of the stitches, and how far apart your guidelines are. Once you've got the basics down, don't be afraid to experiment to get some different looks. I've posted a diagram of some variations on my Flickr account so you can see them nice and big. And how cool would this look with French knots in a second color in between the loops?

1 comment:
thanks for the clear instructions and pictures. I learned how to embroy when a child but none of the fancy stitches. Some I taught my self but I couldn't get the feather stitch. this is so clear. thank you so much.
Judy Fearis
Post a Comment