25 December 2009

lazy daisy

Lazy Daisy is the common name for the detached chain stitch, which is a looped stitch that can be worked alone or in groups. Once you master it, you can combine the individual stitches in a length (this is called chain stitch) or in clusters to make flowers and leaves. You can even get ambitious and try something like this:

ld01
But, first things first.

Start by bringing your threaded needle to the front. Then take the needle to the back as close as possible to where the thread emerges. Bring the needle to the front at the tip of the stitch.

ld02

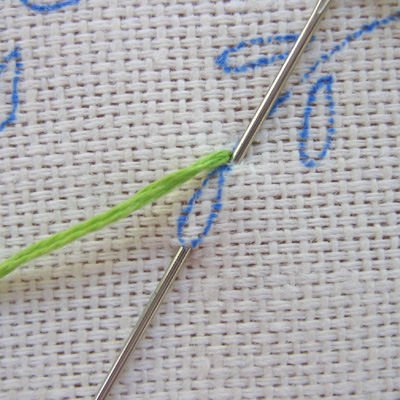
Loop the thread in a counter-clockwise direction under the tip of the needle.

ld03

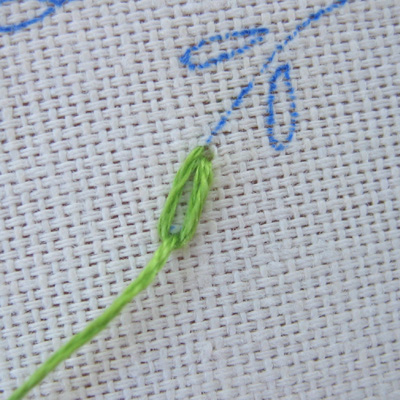
Pull the thread through. I’ve read directions that say to hold the loop down with your thumb to prevent the loop from twisting, but if you’re careful I don’t think that’s necessary. The tighter you pull your stitch, the thinner the loop will become. So, if you want nice round loops don’t pull too much.

ld04

To anchor the stitch, take the thread to the back just over the loop.

ld05

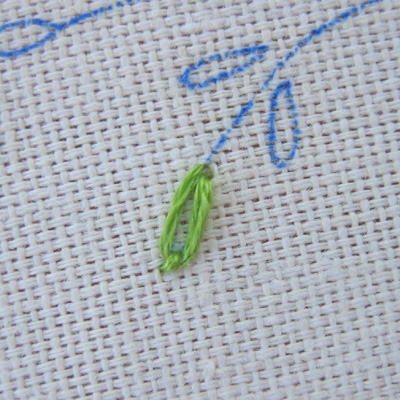
That’s it. And to make a chain, instead of taking the thread to the back, just continue along making individual stitches until you get to the end.

ld06

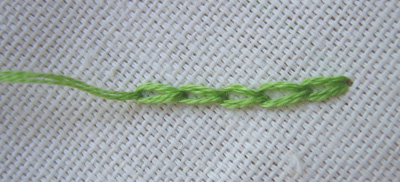
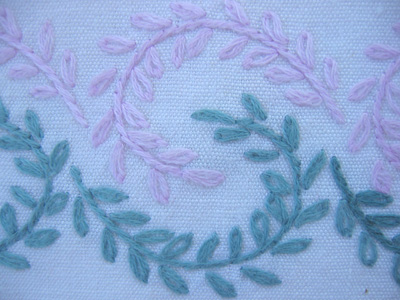
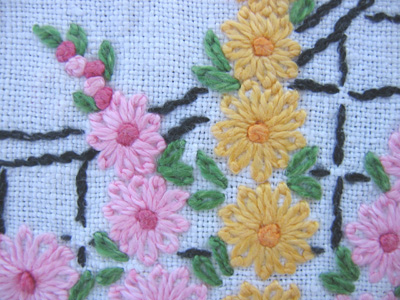
To make flowers, group a series of individual stitches in a ring. You can vary the length of the stitch depending on the kind of shape you want. Small loops make tiny flowers like this…

ld07

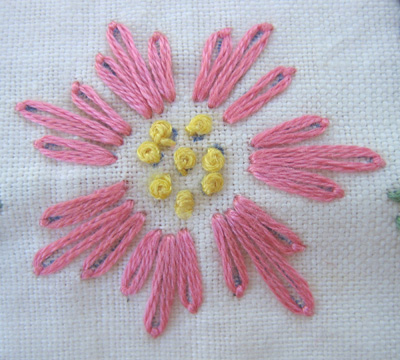
Longer stitches make long petals…

ld08

You can use a second thread in a contrasting color to create a flower like this…

ld09

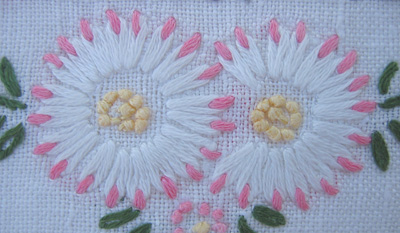
You’ll see lots of French knots in the above pictures because they’re often used for the centers of flowers, either singly or grouped. You can see how to do that stitch here.

12 comments:

Anonymous said...

this is a great stitch i actually learned a stitch i have been trying for years

Brenda said...

I really love your blog and enjoy embroidery myself. Daisy stitch is my favorite to sew.

ButtonsInTheAttic said...

I love your blog--it is wonderful for brushing up on stitches I haven't used in a long while. Thank you soo much!

M'lady said...

Used the lazy daisy stitch learned form your blog to decorate my bag http://stitchintimeandspace.blogspot.com/2011/12/bonnets-and-bags-upcycled.html
Thanks for such a great resource.

Unknown said...

thanks you made it so easy to understand thanks for a great blog janet x

Unknown said...

thanks you made it so easy to understand thanks for a great blog janet x

Santy Shyam said...

Hello ,
Thanks for this nice tutorial.......... :)
I want to know is there any versions of lazy daizy stitch like 2 directional, 4 directional, 6 directional etc...

janet said...

Santy, I'm not sure what you mean by directional; can you explain? As far as I know, this is a pretty simple stitch with no variations in the stitch itself, just in how you use it.

Santy Shyam said...

Sorry for the delay in answering and thanks a lot for your speedy reply. This question was asked to me by one of my sundayschool students who is doing a siploma in fashion designing.She needed some designs to put in her project and what she meant was designs/patterns of lazy daizy stitch where four lazy daizy stitch in four different direction and six stitch in six direction and so on...Sorry to bother you...I asked her to look in to this tutorial page where you had given very good designs from which she can get inspiration.....Thank you

janet said...

Got it. She just needs to look at embroidery with lazy daisy stitches for inspiration and I know I've published lots of vintage examples. She might check on Pinterest, too. There are more boards on embroidery than you can imagine and all of them have gorgeous examples of all kinds of stitches!

Karen K said...

Thank you great tutorial

K

नाजिया शाहीन said...

thanks for step by step information... it helps me a lot...