


In the first beads post I showed you the basics of attaching beads to your work. But how do you attach objects with a single hole? And how do you make those cool hanging fringes like on the gray purse I showed in that first post? By sewing one bead on top of another, of course!
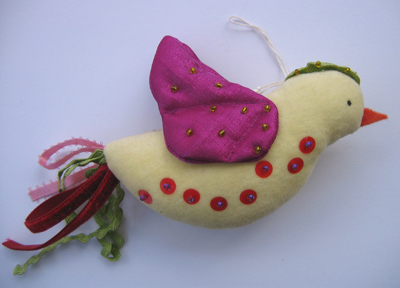

For sequins (like on the bird holiday ornament shown above) or for a button with one hole (my examples are German pink glass cup-shaped flowers) lay the object on the fabric, come up through the hole with your needle, slip a small bead (or pearl in this case) onto the needle, then go back down through the hole—the object is held in position by the bead.

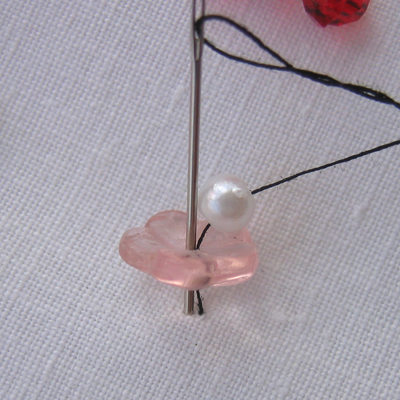

You can attach anything flat this way—a cutout felt flower, a small metal washer, a length of ribbon (using a row of beads)—anything that isn't too thick and that you can make a hole in. All you need to worry about is that the top bead is large enough to not fall back down the hole in the object underneath. Sequins aren't a problem because the holes are tiny but if you decide to attach objects you'll need to consider this.
To make fringe, thread the beads onto your needle, pull your thread through, go around the last bead, then back through the others. Secure your thread back at the place where you started.
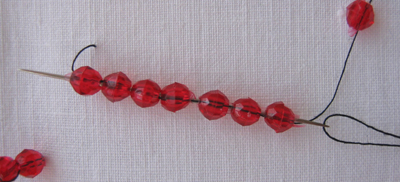

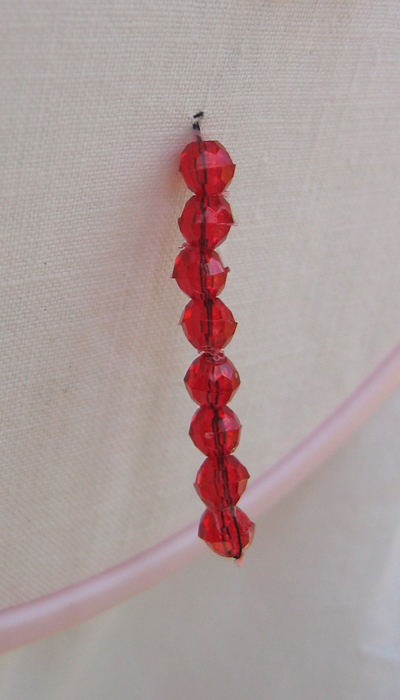
This is kind of like using a head pin in jewelrymaking with your top bead taking the place of the metal cap. And you can use a bead that's smaller than the others for your end bead—your thread will be less noticeable that way. Make sure you use a nice strong thread for this technique—you want flexibility and "swing" without your fringe breaking and scattering beads everywhere.
One more post about beads will be coming shortly—with some ideas about where to find cool ones!

No comments:
Post a Comment