27 August 2008

interlaced running stitch

I found this stitch in Erica Wilson's Embroidery Book at the library (published in 1973 and a good reference book if you can find a copy). It's a compound stitch that uses running stitch as the base and then weaves another color of thread through it. An easy stitch that's perfect for me to cover this week since I'm busy with my houseguests.

So start with a line of running stitch, each stitch the same width and evenly spaced apart. Complete this to whatever length your finished line will be and finish off the end on the back. Rethread your needle with a second color and come up underneath and in the middle of the first stitch.


Weave this thread through the line of stitches, going over and under, without piercing the fabric.


When you come to the end, weave under the final stitch, then turn and come back in the opposite direction.


Go over and under each stitch again, making sure not to pierce the fabric.


When you come back to the beginning take your thread to the back in the same place where it first emerged and finish off.


Here's what it looks like with widely-spaced and smaller, more closely spaced base stitches.


You could use the same color thread for both and have a simple chain but I think it provides more possibilities using two colors.

16 July 2008

chicken scratch

Chicken scratch embroidery (also called snowflaking, Tenneriffe lace, or Amish embroidery) is a form of cross-stitch that is done on gingham fabric using the edges of the squares instead of counting threads. It's usually done with white thread so the end result looks like lace. You can also work the designs with thread that is the same color as your gingham—this is called reverse chicken scratch.

The technique uses three simple stitches—the double cross-stitch, the straight running stitch, and the woven circle stitch. I'll show you all three.

Double Cross Stitch
Work a cross stitch from corner to corner in one square of the gingham. If you're using the darker color for reverse chicken scratch (in this case, red), work in the white blocks.


Then work a straight cross stitch over this. Remember to do your cross stitches in the same order so all your threads go in the same direction.


Running Stitch
I talked about running stitch a while ago and this is essentially the same thing. Working from right to left, take a stitch from one side of each gingham square to the other, skimming under the squares in between.


Woven Circle Stitch
Bring your needle up in the same hole as the running stitch. Slip the needle under the running stitches to form a circle.


Go around the circle a second time, then insert your needle in the same hole that you started from.


Here's what they look like together.


These pictures are of a lavender gingham apron that's for sale on my website. Very simple design with rows of chicken scratch on the waistband, along the top of the pocket, and above the hem. It's exactly the same design I showed above; just repeat to form rows.

lavender gingham apron

chicken scratch

To read more about chicken scratch embroidery and to see some different designs check out:

Feeling Stitchy post on Chicken Scratch.
LindaB's Flickr set with beautiful examples from her vintage apron collection.
General instructions including a pattern for a heart-shaped motif.
Some background and a pattern for an eight-pointed star.

19 June 2007

braid stitch

When I sat down to work on and photograph this stitch I ran into all sorts of problems. I'm embarrassed to say that I couldn't figure out how to do it, either from the written directions or from the drawings. Maybe I was overtired—who knows? But then I found the stitch in another book—one with photos—and I "got" it. And that's why I show you step-by-step photos. It's not that these stitches are hard to do. In fact, once you've figured them out and completed a few inches of embroidery, you'll laugh at yourself and wonder what the problem was. Just what I'm doing right now :)

So, without further ado, I present the Braid stitch. You'll want to work with two parallel drawn lines for this to keep the top and bottom aligned and you'll work from right to left.

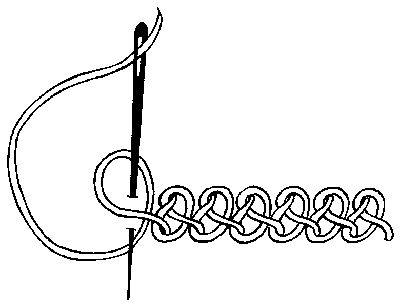
Here's the original drawing, which doesn't look so bad now (but oh, those written directions made no sense at all)


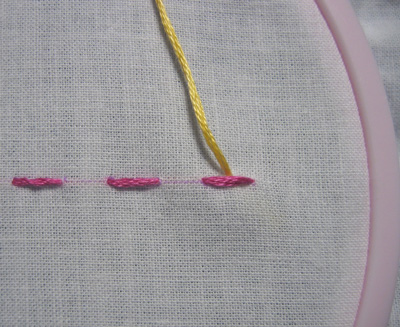
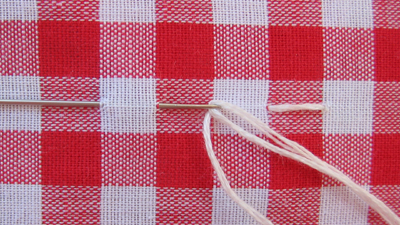
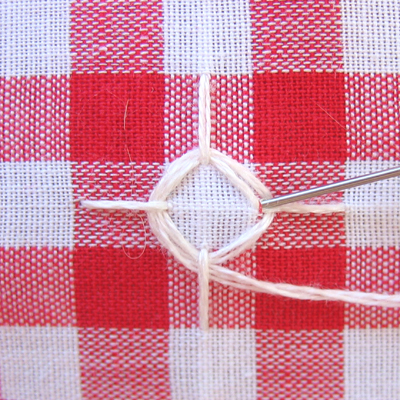
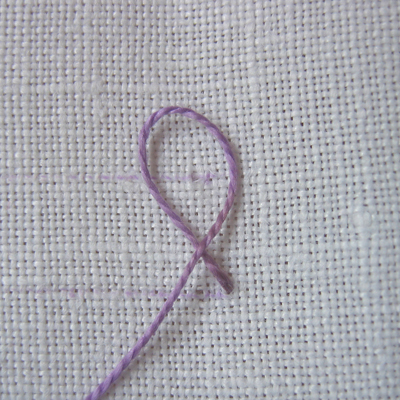
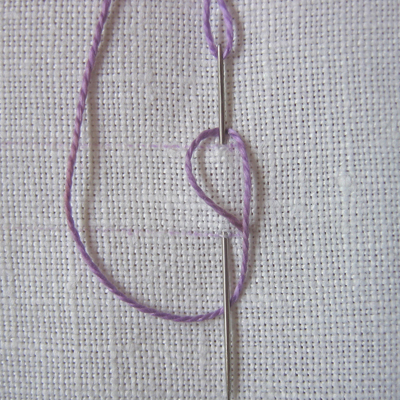
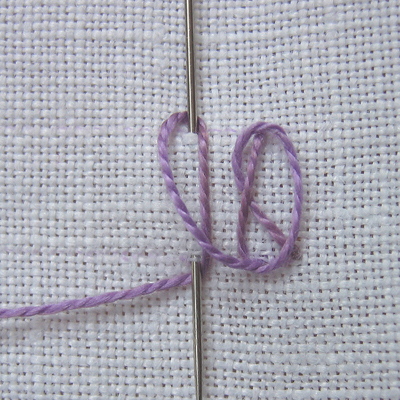
Start by bringing your thread to the front on the bottom line. Then make a loop like this (first loop the thread to the left, then flip the loop over from right to left). This is an awkward motion and didn't come automatically to me for some time.


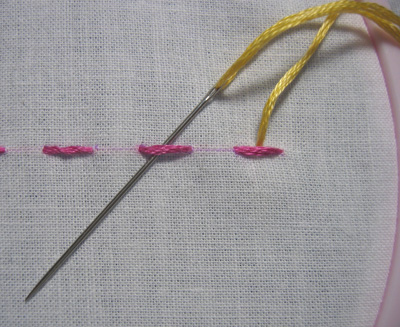
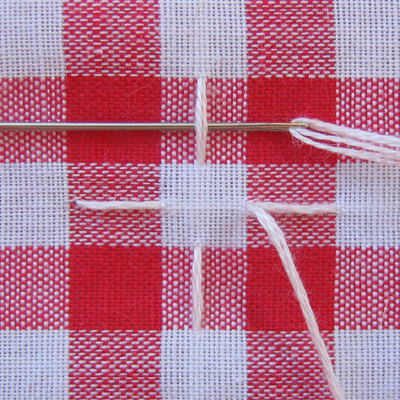
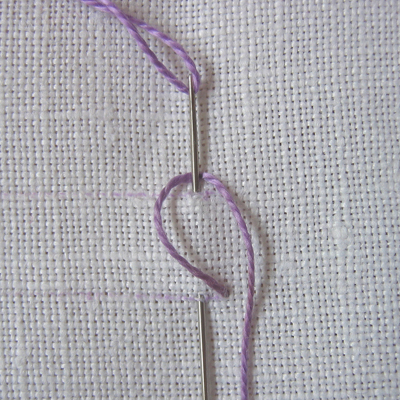
Holding the loop with your thumb (not shown in photo), take a long vertical stitch from the top line to the bottom. Keep the threads out of the way exactly as shown.


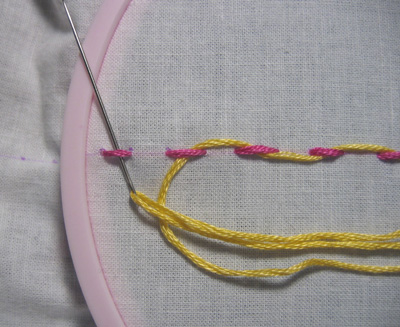
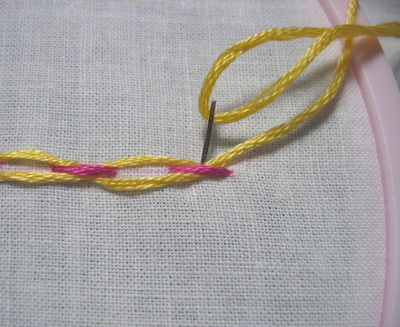
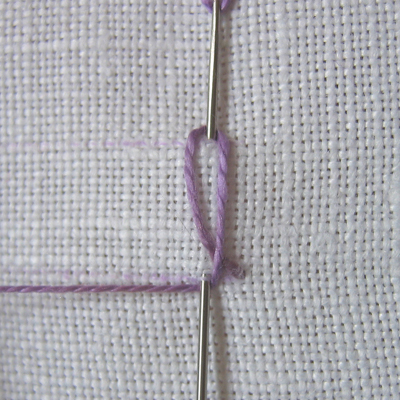
Now loop the working thread from right to left under the tip of the needle.


Pull the loop tightly around the needle.


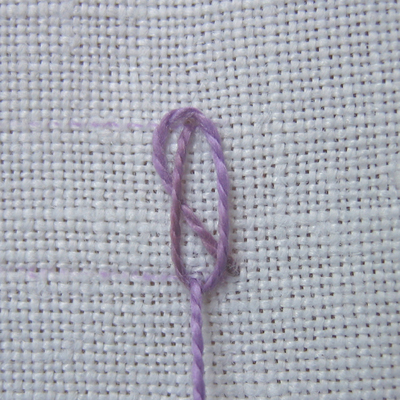
Pull the thread through with a downward motion, holding the loop down lightly with your thumb. Be a little careful here to not pull too tightly. There's nothing holding the top loop, it's just lying alongside that top thread. If you pull too much it makes a real mess (trust me on this one).


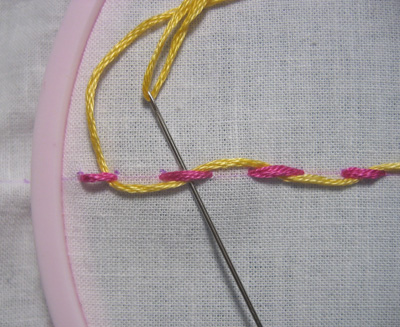
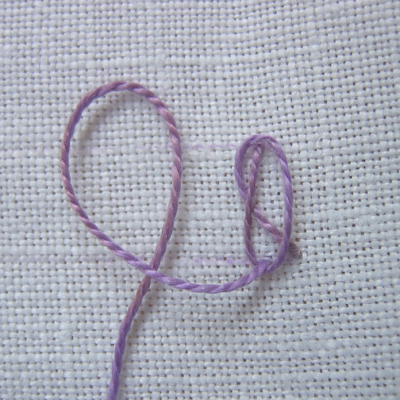
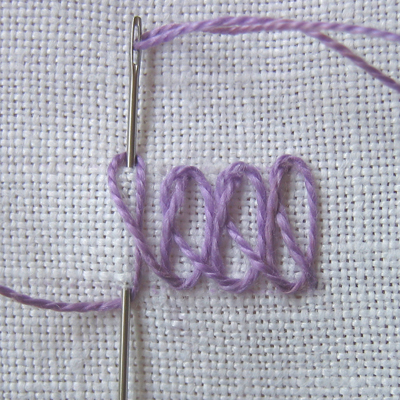
Make a second loop like you did in the first step.


Again insert the needle through the loop, making a stitch from the top to the bottom line. Loop the thread under the needle as you did before. Pull the thread through to complete the second stitch.


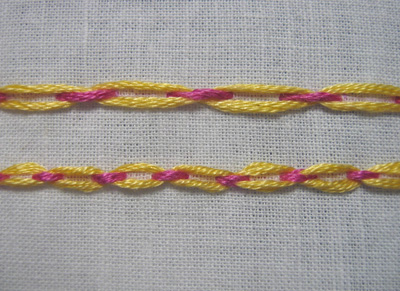
Continue working until you reach the end of your line.


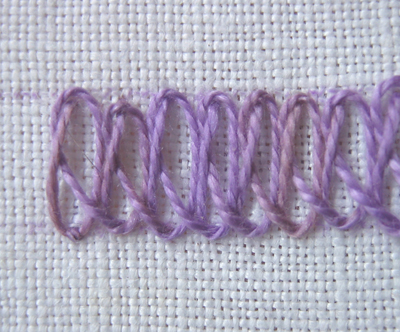
Here's what it looks like.


You may be wondering why my thread looks different this time. It's because I'm using something called perle cotton. Perle cotton is a tightly twisted pure cotton thread that doesn't get divided into strands when used. It was recommended for this stitch—for it's textural qualities—so I decided to try it. It comes in four weights and mine is perhaps too fine for this stitch. That's all I had on hand but I think a heavier weight would have worked better. It was also recommended that you work this stitch fairly small with the stitches close together. I didn't do either but it would have been impossible to show what was going on at a smaller size. As with all stitches, varying the length and spacing will give you different looks. Learn the basic steps first and then experiment to get the look you like.