


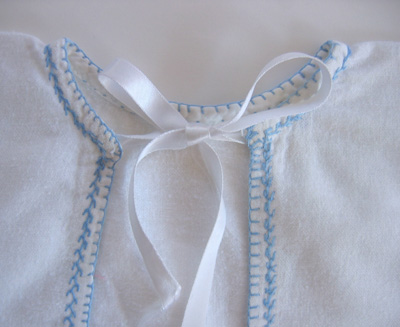
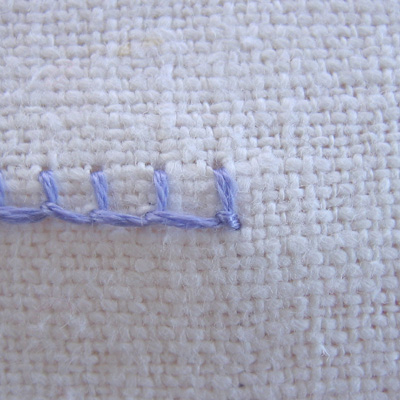
Today we’re talking about Blanket Stitch and (no surprise here) it’s traditionally used to edge blankets. It also makes a great edging for tea towels, dinner napkins, and baby sacques, which are little flannel kimono-type garments that are open in the front and tie at the neck with ribbon. Here’s an example:
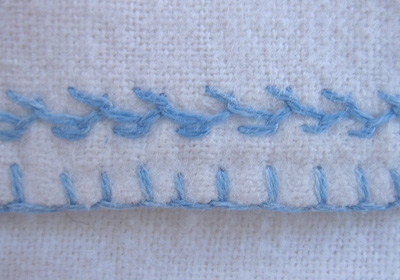
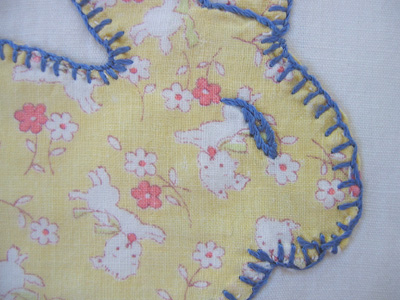
The top stitch in the second picture is called feather stitch and you'll find instructions for this stitch in the stitches list in the lefthand sidebar. Blanket stitch can also be used for attaching appliquéd pieces of fabric to a base. Here’s an example from a vintage baby quilt—
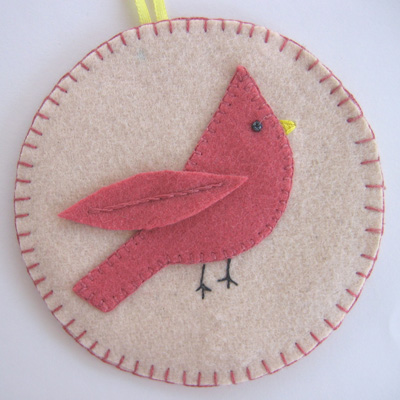
And here’s a holiday ornament I made from felt. The cardinal’s body is attached to the underlayer with tiny blanket stitches and the two circles are bound together at the edges with larger blanket stitches. Blanket stitch works very well around curves!
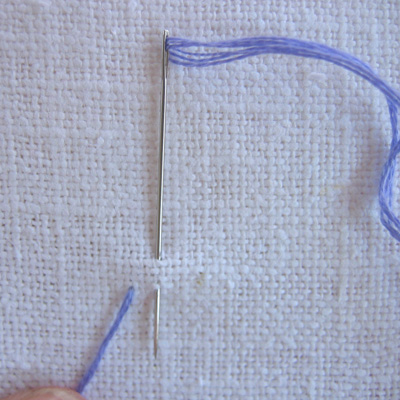
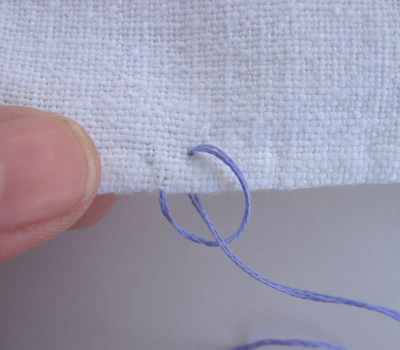
To start bring your thread to the front. Take the needle to the back about ¼ inch away (diagonally) and come down so the stitch is aligned along the bottom.
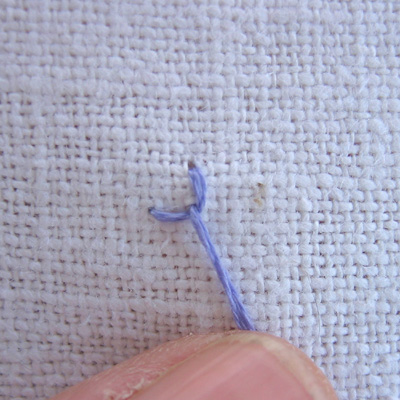
Making sure your thread loops under the needle, pull it through until it lies tightly against the emerging thread.
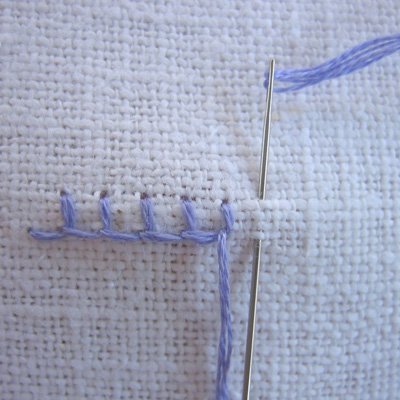
Take the needle to the back again and emerge ¼ inch away from the first stitch. Continue along until you’ve reached your desired length. You'll see that each new stitch secures and holds the loop of the previous stitch.
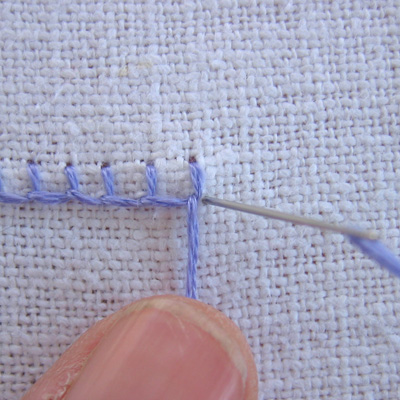
To finish, take a small stitch to the back to secure the last loop.
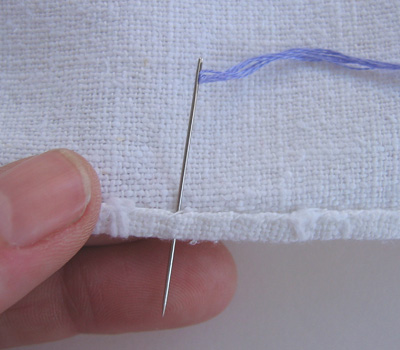
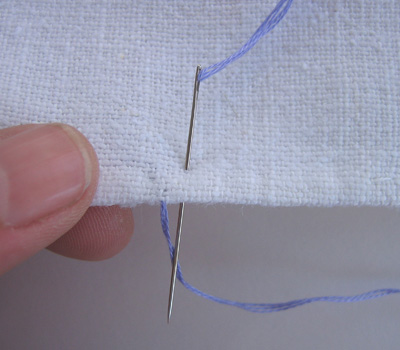
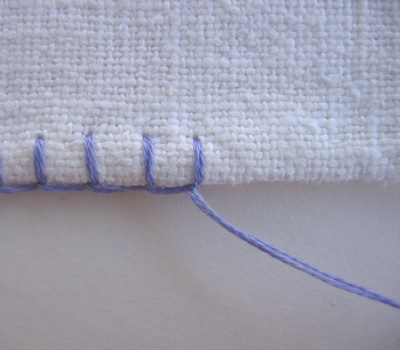
To make a blanket stitch edge for a tea towel, start on the back side by bringing your thread under the hem and through the fold. (If you'll be working from left to right on the front, start at the far right on the back.)
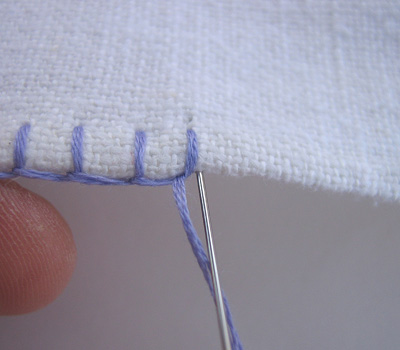
Turn the towel over and work your line of stitches along the edge. I used a towel that was already hemmed for these pictures but you could use this stitch to decorate and hem the towel at the same time. Just make sure that you catch the folded edge on the back with your stitches.
When you come to the end, take your thread to the back over the last loop to secure it. Bring your needle back through the fold to hide the ending and knot it.

12 comments:
Thank you for great instructions!
Thank you, thank you, THANKS!!!
Hello
Thank you for this wonderful website and the tutorials which I will be working through! I wanted to ask if it matters how close together the stitches are for blanket stitch as mine seems to have fallen of the edge and does not look as neat as some that I have seen (this could just mean I need practice!)
many thanks in advance
Great!! Im excited now to start my baby blankets! Thank you...
Hi!
I have a BUNCH of books on embroidery laying on a shelf not 15 feet away from me. When I needed a refresher on the blanket stitch, I thought of Stitch School first. Am I too lazy to walk 15 feet or is Stitch School that great? STITCH SCHOOL IS THAT GREAT!
Thank you!
Ann
Thank you, Ann! I have a bunch of books, too, but it's really hard to "get" a stitch by looking at one drawing and a bit of text. Much easier to see it in a step-by-step tutorial and that's why I started Stitch School.
Zoe, I'm very late answering you—sorry about that. It only matters that you don't leave too wide a space between stitches because your bottom loop will be long. Mostly I've seen it about 1/4-1/2 inch apart. It doesn't hurt to do it closer but any wider might cause the problems you mention.
Thank you! I was having the darndest time trying to START my blanket stitch and I looked in 3 books and a bunch of websites before I finally found instructions that made sense. Yes, apparently I'm an idiot, but I wasn't going to be happy with the first stitch looking wonky. I'm bookmarking your site now.:)
I just found your blog today and love it! I have always wanted to know how people added this stitch to blankets. I am so excited to get started! Thank for taking the time to teach the rest of us.
Hi. Thanks for the great tutorials. I do have a question for you:
I am working a baby blanket and doing this stitch around the outside. How do you start another thread once it runs out? (how do you connect them w/o it looking bad?)
Thank you for your help!
CR
Hi Claire! Unless your baby blanket has a turned up edge where you can hide a knot, there isn't really a perfect way to start and stop. I'd suggest hiding your starting knot behind the one you used to finish your first thread. So, knot your new thread and bring it through the first knot so both knots lay close together, then continue on. If you can manage to end at a corner it will probably be less visible.
Hi there! Somebody has probably already figured this out by now, but just in case they haven't, I thought I should post this! A solution to the start/stop problem! My solution is for when you're working on a fleece blanket, and you want to hand-sew a blanket stitch edging for it. What you do is, you roll the edge over a bit. Like, you're making a narrow "rolled hem". Just roll the fleece over a bit, about 1/4 of an inch or a bit more. That gives you a place to hide your knots when you're stopping and starting a thread! To start your thread, of course knot it, and tuck your threaded needle into the "rolled hem". Use your fingers to hold it down, and begin your blanket stitch as usual, stitching over the little section of "rolled hem" where you've hidden your starting knot. Continue on, rolling the edge of the fleece as you go along, until you come to the end of your thread, or where you'd like to end your thread. Again, tuck your threaded needle into the "rolled hem." Knot your thread, hiding it in the roll. Then, re-thread your needle, knot it, and hide the knot in the roll very close to, or on top of, the ending knot from your previous thread. Then, begin again to sew your blanket stitch as usual, continuing to "roll" the edge of the fleece as you go along. I'm still working on my first fleece throw using this solution, and so far I really like the result! It gives the edge a pretty little finished look, almost like a scallop but not quite. Very easy and what a relief to finally have a solution to this rather frustrating sewing dilemma!
Finally, someone with simple and easy to follow instructions! I'm just learning to sew and it is so nice to find a blog that is easy to follow. Thanks!
Post a Comment