We'll be starting with a cross stitch that's narrow at the top and wider across the bottom. Draw some guidelines to help keep your stitches straight if you like. Start by bringing your needle up on the left outer line then take a small stitch from right to left directly above it (needle down on fourth line and up on second).
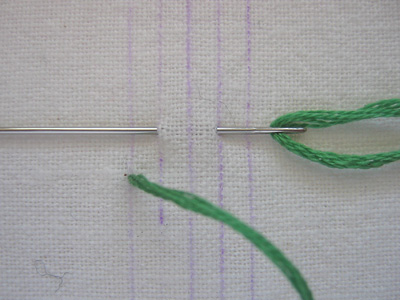
Pull the thread through, then take a diagonal stitch from the right line back to the left line directly underneath and slightly below the beginning of the first half of the cross.
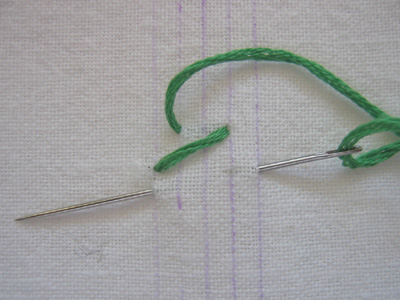
You can see the finished cross a little better in this picture. Now slide your needle behind the crossed threads being careful not to pierce the fabric.
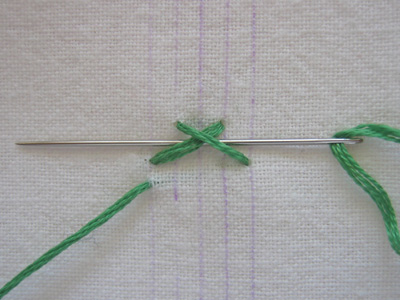
Pull your thread through and this will be the beginning of your second cross. Take another diagonal stitch from the right line to the left slightly below the previous cross.
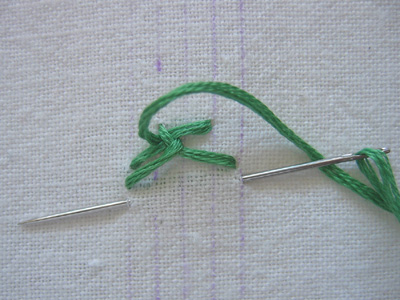
Pass your needle underneath but this time be careful that you only go under the previous stitches and that you don't catch any threads from the stitch above it. It makes quite a mess if you do. It may be a good idea to work this stitch with a tapestry needle—it's blunt tip will make this part easier.
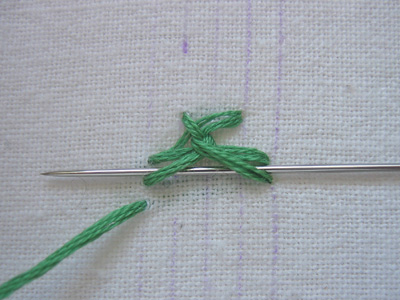
Continue making crosses and passing your thread behind them until you've completed your length of stitching. When you come to the end take your thread to the back at the bottom right of the last cross.
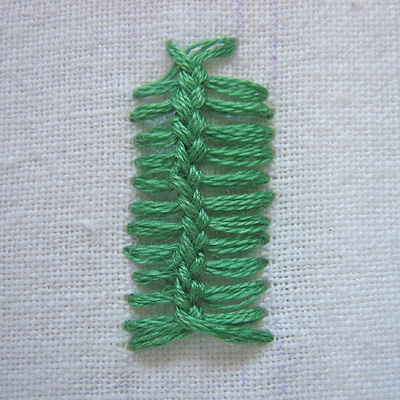
It's really pretty easy although the fabric I used (cotton toweling) was a bit too soft for this stitch. I found it very hard to keep the tension right so my center braid and outer edges (even following the guidelines) are not perfectly straight. As with most of these more complicated stitches, they take a bit of practice before they feel comfortable. And, in this case, a stiffer fabric.


2 comments:
this website is SO awesome! I check it nearly every day; glad to see you're back. :)
thank you very much! I like this stitch a lot and the pictures are very explicit on how to do them.
Post a Comment